Pleats, Pockets, and Pins

Anyone been missing me lately?  Or my posts, at least?  Here’s the (partial) scoop on where I’ve been:

1.  I became an adult.  That is, I got a job, and I subsequently learned that jobs have much in common with vampires in their tendencies to suck lives away.  It’s not a bad job, but let’s just say it’s not my dream job, either, so there are definitely other ways I’d like to be spending my time…which leads me to:

2.  I’ve been working diligently on a project that I’ve been trying to complete for several years now, and it is finally nearly finished.  I hope to be able to announce it here soon, not because it’s necessarily “blog-related”, but it’s certainly “my-life-related”, so why not, right?

3.  I still have to sleep, and there are only so many hours in the day (24, to be exact).

My point is, in the words of Bryan Adams:  Please forgive me.

I’ve still been crafting and cooking and taking plenty of pictures along the way, so all will be shared eventually, perhaps when my husband allows me to quit my job and spend my days creating lovely, simple things and sharing them (WARNING:  extreme exaggeration ahead) with my millions of followers.  Or, probably more likely, I’ll simply share them at a glacial rate over the next several months.

And now, as a reward for your patience (in waiting for this blog post, as well as reading all of my rambling up to this point), I present my latest sewing project:

I dearly hope that you have enough confidence in me to know this already, but for those of you who are unfamiliar with my impeccable fashion sense (read:  I can dress my self in the morning), I will make it clear:  THIS IS A BEFORE PHOTO.

I bought this large, shapeless dress for $3 at a Goodwill.  I had originally wanted to cut it up and make a throw pillow or two, but when we put up apple/lime green curtains in our living room, that plan was quickly thrown out. Instead, I decided I would remake the baggy dress into a skirt.  The photo above is actually the first step in the process:  deciding where to cut (the second step if you include brainstorming with my mom and sister to decide on a shape for the skirt).  I used a necktie to secure the dress where I wanted it to sit at my natural waist and adjusted the dress until it was the length I desired.  Then I pinned the waist (while the dress was still on) where I would need to cut.

I then laid the dress flat, lined up the hemline at the bottom, smoothed out any wrinkles, and measured from my pins to the hemline.

I don’t remember what the length was, but I used that measurement (plus about a 1/2″ – 5/8″ seam allowance) to keep my cut straight, just moving the tape measure across as I cut from one side to the other.

The dress I used had a zipper running down the back, and because it was long enough, I decided to keep part of it for the skirt so that I wouldn’t have to worry about sewing on a new one.  As you can see below, I cut all the way across the dress except for the zipper, which I cut through at the end using craft scissors (rather than the sacred sewing scissors).

If you do this, make sure to pin your zipper open (I safety pinned the zipper pull to the skirt).  Otherwise, your zipper pull might come off and you’ll have no way to fix it except to sew on a new zipper.  Major bummer.

Once you have your skirt cut out, you can make the waist band.  Start by cutting off another section of the dress all the way around.  To decide the width of this piece, take your desired waistband width, multiply by two, and add 1/2 to 1 inch for seam allowances.  As for mine, I cut a four inch wide strip and ended up with a 1 1/2″ waistband.  If applicable, I highly recommend completing this step at your mother’s house, where you can use all her fancy gadgets, like this really nice rotary cutter. Otherwise, scissors and a tape measure will do just fine.

The next step is to cut your waistband to the correct length.  If you plan to add a button closure like I did, you’ll need to add an inch to your waist measurement, plus another 1/2 inch for – you guessed it – a seam allowance.

After you finish the waistband, you’ll need to round up some interfacing.  This will help keep the waistband laying flat rather than bunching up or looking flimsy when you wear your skirt.  Cut a strip of interfacing to the same length as your freshly cut waistband and half of its width.

Now comes ironing.  First, iron your waistband in half lengthwise, insides facing in (how it would be on your skirt).  Next, unfold the waistband and fold and iron one edge 5/8″.  This half of the waistband will be facing the inside of your skirt, so plan accordingly if you want a particular side to show.  Lastly, iron your interfacing onto the other half of the waistband.  If this all sounds confusing, hopefully this picture will help:

If you’re still following me, take your waistband over to your sewing machine. Fold it the opposite way as your ironing (so the good sides are facing in) and stitch up both ends 1/4 inch from the edge.  Flip it back to right-side-out, and you should have something that looks like a waistband (or at least a strip of fabric with finished ends).  You’re now ready to pin it onto your skirt.

This step will be a little different for everyone, depending on the shape you want how much extra fabric you have.  Because I started with a large dress, I had plenty of fabric to pull into pleats, but I also had existing seams in the back that meant I couldn’t add pleats there, because they wouldn’t lay right with the seams.  Your situation may be different, but I’ll share mine anyway.

I ended up doing two inverted pleats in the front and a little pleat at each side seam.  My process was as follows:  pin the skirt to the waistband (starting in the back around the zipper, then the center-front), try it on, decide what to adjust, and repeat.  It took awhile, but I ended up with a shape I really like, so it’s definitely worth the effort.  I forgot to take a photo of my pinned pleats, but here’s one of the waistband pinned to the back of the skirt (with a 1″ flap for the button), along with some safety pinned zipper action:

My next step is one I would consider optional.  With plenty of encouragement from my mom, I decided to add pockets.  It takes a little extra time, but it isn’t too tricky and is definitely worth it.  Seriously, who doesn’t love pockets in a skirt?  Your boyfriend/husband will appreciate the extra effort, too, when he doesn’t have to carry your lipgloss in his pocket.  Here’s how you do it:

1. Draw a pocket-like shape (with a flap on the end – see photo – for a seam allowance) on paper, and use this as a pattern to cut the pocket out of whatever fabric you choose.  You’ll need four pieces.  I pinned two layers together and cut them out at the same time so that I only had to trace and cut the shape twice.

2. Rip out the side seams on your skirt as far down as you want the pocket to go.  To figure out the length, I held my arms at my sides, slightly bent, and had someone else put a pin in the side seam at the bottom of my wrist where it would naturally rest at the lower edge of a pocket.  You could also use another skirt that has pockets already to determine the placement.

3. Flip your skirt inside-out and pin your pocket pieces in place (any raw edges should be facing in).  If you have two layers pinned together like I did, separate them first and pin them to the skirt individually.  After that, you can sew each pocket piece (along that little flap) to the skirt where you ripped out that seam. But first, double-check to make sure everything’s going the right direction so you don’t end up with a pocket on the outside of your skirt or something. Then, after you have them sewn to the skirt, pin the two pocket pieces back together with your side seam lined up.  It should look something like this:

4.  Sew.  Starting at the lower edge of the pocket (closer to the bottom of the skirt/the left side of the photo above), sew along the existing seam, toward the pocket.  When you have sewn about 1/4″ onto the pocket (right where that blue pin is on the left side of the photo), turn the fabric and sew along the outside of the pocket.  Finally, finish sewing up the side of the skirt where you ripped the seam out earlier.

Now, if you flip it back to right-side-out, you should have a skirt with pockets (yay!) pinned to a waistband.  Let’s sew on that waistband, shall we?

You should have an ironed seam right down the middle of the waistband. Fold that over to see how the waistband fits around the skirt.  The inside edge (which should be ironed up 5/8″) should fit around and cover the top, raw edge of the skirt.  If it does, then go ahead and sew the waistband where you have it pinned.  If the waistband doesn’t cover the raw skirt edge, move your pins down a little and then sew, or simply sew a wider seam allowance than you have pinned.

Once you have the outside of the waistband sewn on, you can hand stitch the inside.  Using a simple whip stitch, sew the inside edge of the waistband to the rest of the skirt so that your waistband lays flat.  If you added an extra length of waistband for attaching a button, sew that flap closed, too.

After that step, you’re pretty much done!  All you need is a closure for the back.  If you’re doing a buttonhole closure, stitch/cut your buttonhole onto the short end of the waistband, near to the edge, and sew your button onto the extra flap that you added earlier.  If you don’t want a button or don’t have a buttonholer on your machine, you can use a hook and eye closure instead.

And you’re finished!  Now go model that beautiful creation (the skirt and yourself!).

I wore mine out for a day of (grocery) shopping followed by a photo shoot in a field.

It was an absolutely gorgeous day, perfect for a happy, flowery yellow skirt.

And then a giant spider landed on me.

Okay, the spider was tiny, but it did land on me.

Here’s a shot of the back, so you can see the closure – not so I could put a picture of my butt on the internet, if you were wondering.

I’d love to see your version of this skirt, if you decide to make one and manage to follow my tutorial.  Please let me know if you have any questions.  I really love my new skirt, and I can’t wait to wear it with a sweater and boots now that the weather is showing clear signs of my favorite season:  Fall!

Yep, that one was pretty much so that the last thing you saw wasn’t a picture of my butt.  You’re welcome.

Total money spent:  $3

Total time spent:  3 hours
Linked up at:

Accessor-ease

I’ve always said that good hair is the best accessory.  It makes literally any outfit look better.  So, what about good hair that’s also well-accessorized?  Even better.  If you, like me, have grown tired of bobby pins and boring headbands and you want a solution that you can make in ten minutes while watching tv – here it is.  Oh yeah, and it’s free, as long as you have some scrap fabric laying around.

My initial inspiration came from this sweet headband (from here):

And then there was this one (from here):

I love the casual look of the knit fabric mixed with the sweet flower.  For mine, I decided to use an old pair of black, patterned tights (apparently I have a thing for sewing with tights), but you can use any stretchy fabric you have around (an old t-shirt would be perfect).

I cut a long strip from the tights and trimmed it until the length and width were right (i.e. lots of holding it up in the mirror, trimming some more, holding it up again).  Then I stitched the short ends together with a loose basting stitch so it would gather (like you see in the first photo above).

I apologize for the awful photo showing this step.  While I’m at it, I also apologize for not having photos of the other steps at all.  Really, it’s so simple you don’t need them.  If you do, that’s okay, just google different combinations of:  fabric, flower, rosette, tutorial … until you find one you like.

The next thing I did was cut another long strip out of the tights, about an inch or so wide.  The length will depend on how big you want your flower to be, but you can always add another strip on later if you don’t have enough. Then I began twisting, gathering, and stitching the fabric into a coil-like flower, sewing it directly onto the gathered part of the headband as I went along.  Your process for making the flower will depend on whether you want a messier-looking flower or a nice and neat little rosette, or something in between.  If you’re nervous about messing up, you can try out a few different methods before sewing it onto your headband, but I find that the best part about rosettes is that they’re so hard to mess up!  Even the messy ones look cute, and no one will know if you didn’t intend for it to look that way.

Here are a few shots of how mine turned out:


Nothing like a quick project to liven up your hair wardrobe, eh?  I think I’ll be making another one in red to support a certain favorite team of mine. Happy crafting!

Total money spent:  $0
Total time spent:  10-15 minutes

It’s Done! (For real this time.)

Remember eons two weeks ago when I revealed our lovely headboard? And then I asked you to vote for whether or not I should tuft it?  And then I left you hanging for what seemed like forever?  Well, the wait is over. Miss Headboard is back, and she’s got a whole new attitude.

What’s that?  You don’t see the new ‘tude?  That’s probably because, as it turns out, Miss Headboard is a little camera-shy.  You see, while the tufting looks great in real life, it’s really hard to see in photos.  Try not to hold it against her.

Let’s talk about how the tufting came to be.  Enter these guys:

I actually had 3 boxes of refills and 1 box that included the button covering kit (those little blue and white circles at the bottom of the picture).  The instructions on the box explained how to cover the buttons, which was a really simple process.  It took about 15 minutes to cover 10 buttons with the leftover fabric from the headboard.

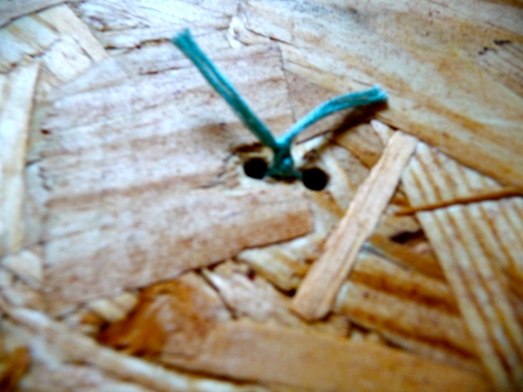
Do you remember how we drilled 20 little holes in the sheathing that makes up the back of the headboard?  This is where those come in to play.  I threaded a 2″ needle with embroidery thread and stuck it straight down into one of those holes in the back.

I used that little piece of tape to make sure I didn’t pull the thread all the way through.  It’s definitely not necessary, but it doesn’t hurt either.  It’s sort of like the safety on a gun…wait, no, that’s a bad example.  Maybe it’s more like using non-stick spray on a non-stick pan.  Anyone else do that?

Once the needle poked through on the other side, I pulled it out, added a button, and sent it straight back through to the other hole.  Sometimes I had to dig around a bit for that other hole, but overall this method worked really well.

Then I pulled the thread tight from the back (pressing on the front of the button helps, too), and secured it with a few knots.

Adjusting the tension (or how deep the buttons sat in the headboard) – and keeping it the same for all of the buttons – was the trickiest part of this project.  If you have a friend to help with this, one of you can push on the button while the other ties the knots.  With my friend (husband) being occupied (watching television), I came up with a different solution. I leaned the headboard forward (upholstered side down) until the button was resting on my kneecap (while I was squatting) and then tied the knots.  With the help of gravity and the weight of the headboard, all my buttons ended up at about the same depth.

And that’s all it takes to tuft.

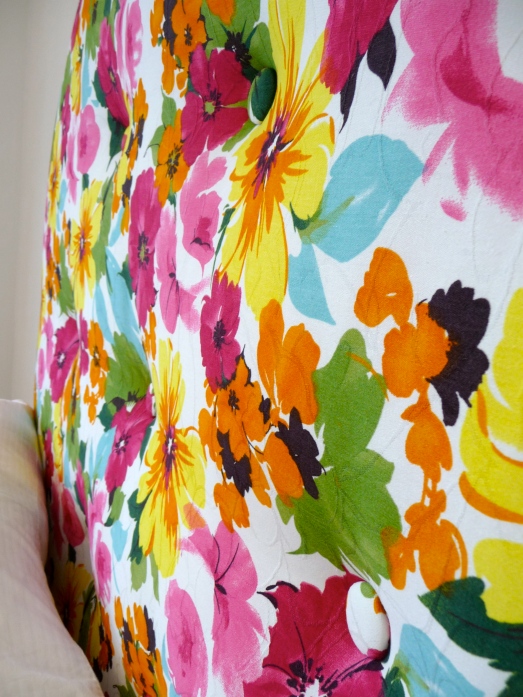
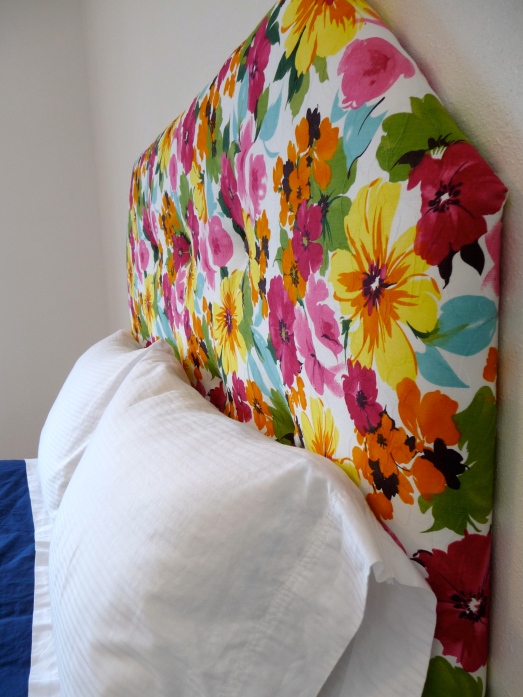
Admittedly, the effect of the tufting is pretty subtle compared to the impact Miss Headboard made right away with her bold colors and pattern, but we’re really glad we went through with it.  She looks so…finished, now.  And check out those curves:

Did you see them that time?  Try this one:

Anything?  Maybe I need to have a talk with Miss Headboard about camera etiquette.

Total money spent:  $8.82

Total time spent:  1 hour

Dress, White, & Blue

Happy Independence Day a few days late!  I whipped up a little something to wear for our nation’s celebration that’s all about using what you already have, and I’d like share it with you. First, let’s take a moment to recognize that, although I’m thankful to my mother for teaching me how to sew, I am no sewing expert.  It’s possible likely that the way I made this dress wasn’t the best way, but it worked for me.  And just in case any readers out there are similarly unprofessionally trained seamstresses (that’s a mouthful), I’ll share the steps to making what I think turned into a very cute, recycled dress.  Judge for yourself:

Just the day before, it looked like this:

And this (ignore the black, flowery fabric on the right – my plans for the dress changed slightly after I snapped these pics):

I cleaned out my closet a few days ago and decided to toss/donate these items. Moving into a new apartment with a rather small closet – and being forced to share said closet with the man you affectionately call your husband – will lead you to do such a thing. And, in this case, it’s not so bad.  Now I have a new dress that I love instead of a dress that’s too big and a shirt I never wear.  I encourage you to go forth and discover gems like these hiding within your own wardrobe.  Then prepare to turn ugly/ill-fitting/not-quite-right into “where did you get that?” … “oh this?  I made it.”

The first step was to cut away the pieces I didn’t need:  the top part of the dress (since it would essentially become a skirt) and the bottom part of the shirt.  For the dress, I simply cut straight along the seam that was already present; where it was sewn onto the top portion of the dress.  This left me with a nice straight edge to what would be the bottom of my new dress.  As for the shirt, I put it on (along with a bra that I would realistically wear with it – this is important:  if you won’t wear it with a sports bra, don’t try to fit it with one!) and pinned the sides where I wanted the waist to be.  I like the natural-waisted look on me, but I think this would look great as an empire waist dress, too, if that’s what you prefer.  After pinning the sides, I measured the distance from the hem to my pins.  Then I measured all the way around the shirt (at about 6 evenly spaced places), marked that distance with a pencil, and cut a straight line between each pencil mark.

It wasn’t perfect, but it was close enough that no one would notice, anyway.  So, I now had the two pieces of my dress, but I needed something stretchy in the middle to make the waist.  I would have used a nice, wide piece of black elastic, but I didn’t have any, and I didn’t particularly want to go out and buy it.  I dug around in my sewing basket, as well as in the box of clothes I was going to donate, and I came up with a pair of black tights that had a pretty significant run in one leg.  The other leg, however, was perfect for making the waist of my new dress.  Note:  I should advise any potential followers that the material used to make tights is not especially user-friendly.  It took to sewing well but tended to gather and roll at the edges.  Although it’s not obvious on the finished project, if you are a perfectionist, less cheap than me, or simply don’t have any old tights laying around, hop over to a sewing store and buy yourself a piece of elastic.  It will do the same job and save you a step or two.

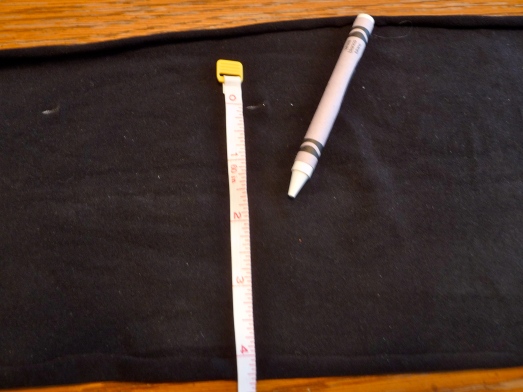
I cut open the leg of the tights and cut a piece to the length I needed (so the waist would be snug but not tight).  After deciding on the width I wanted, I doubled that (so I could have a double thickness of the tights material), and added about 1 inch for a seam allowance. Then it was the same process I used for cutting off the bottom of the shirt, except that I marked the measurements with a white crayon this time.

When I had obtained the right length and width of elastic tights, I folded the material – hotdog style, if you will – and sewed the short ends together to make a circle the size of my waist.

Then it was basting time.  If you’re not familiar with the verb “to baste” and you desire to sew beautiful, flowing skirts and dresses, you’ll want to learn this stitch. Although I can’t show you how to do this on your particular sewing machine, I’m sure you can figure it out with the help of your machine’s user’s guide.  Trust me.  I figured it out on a machine that’s conceivably twice my age with the help of a manual that at some point had been soaked in oil and subsequently has semi-transparent pages.  You can figure it out.

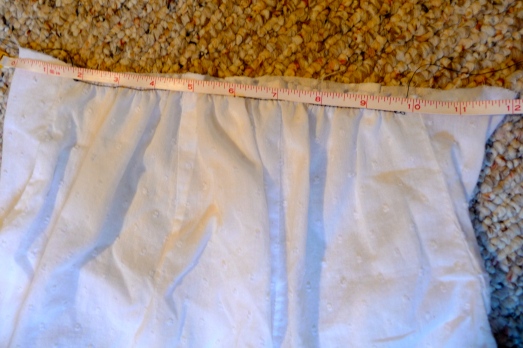
Basically, basting is sewing with a really long stitch that you can later remove or, in this case, pull to gather the fabric.  Since cutting the bottom part of the blue dress away from its bodice, the skirt had become a giant square.  Not very elegant.  After figuring out how to change the seam length on my sewing machine, I sewed all the way around the top of the skirt with a basting stitch, stopping just before my beginning and end stitches met (you don’t want them to overlap, because that might lock the “pulling threads” in place).  Then I took one of the dangling end threads and gently pulled on it, scrunching the fabric together as I went.  It should look something like this:

I used my trusty tape measure to adjust the gathered fabric to the right size for my waist and then tied a few knots in the threads at either end.  I also tried to evenly space all the gathers, so the dress wouldn’t look bulkier in one spot.

The top part of the dress was a little too wide for my waist, too, so I did almost the same thing with that.  Instead of basting and gathering all the way around, though, I wanted all the gathering (at least on the top portion) to be at the back of the dress, so the front would look smooth and flat.  I basted on the back side between the two side seams and gathered it until it was the right width.  Note my very precise measuring technique here, as well as the black thread that I used on a white shirt in order to avoid changing the thread in my very strange, very old machine:

Now I had all the parts of the dress ready to go and the real sewing was about to begin…right after some thorough pinning.  I didn’t want to end up with a big fold of extra fabric at the end, so pinning was very important, as much as I prefer to skip it when possible.

First Rule of Pinning:  Always check several times to make sure that you are pinning the right sides together (yes, I did mess this up once).  Definitely do this before sewing a single stitch, and, if you are less-than-a-fan of pinning, also do this before pinning all the way around.  In this case, make sure you’re pinning and sewing the “good sides” facing each other.

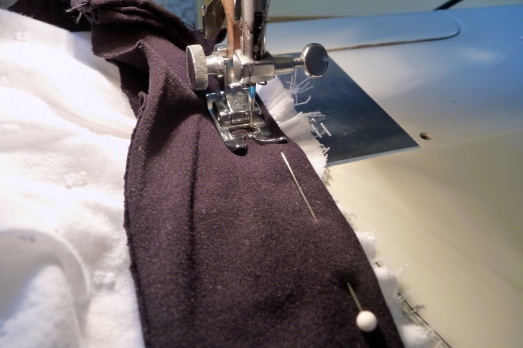
Second Rule of Pinning:  Always place pins so that they point toward the machine as you sew.  This makes it easier to remove them while sewing, and you won’t have to remove them as early, so your product should benefit.  Just make sure to take the pins out before you sew over them or your mom will be really mad needle might break.

If you’re sewing something that needs to stretch, such as the waist of a skirt or dress (if it doesn’t have a zipper or buttons), you’ll want to use a zig-zag stitch. This helps the elastic or other stretchy material retain its stretchiness without being constrained by a tight, straight stitch.

I sewed the folded edge of the waist material first, because I thought that would make it easier to avoid some of the weird bunching and gathering that the material tended to do. I’m not sure if that’s true, but it’s what I did.

In order to avoid overshadowing a classic novel by the length of this post, I will sum up the rest of the steps, which are pretty simple, if you’ve managed to follow me up to this point.

Zig-zag stitch the elastic to the top of the dress.  Overlap your stitching a bit at the end to make it more secure.

Pin the bottom of the dress to the elastic (optional: ignore the Rules of Pinning and repeat this step later with much frustration).  Also, if your skirt/dress bottom has side seams or pockets, be sure to line them up with the side seams on your top.  It’ll look nicer that way.

Zig-zag stitch the skirt to the elastic.  Diddo the overlapping thing.

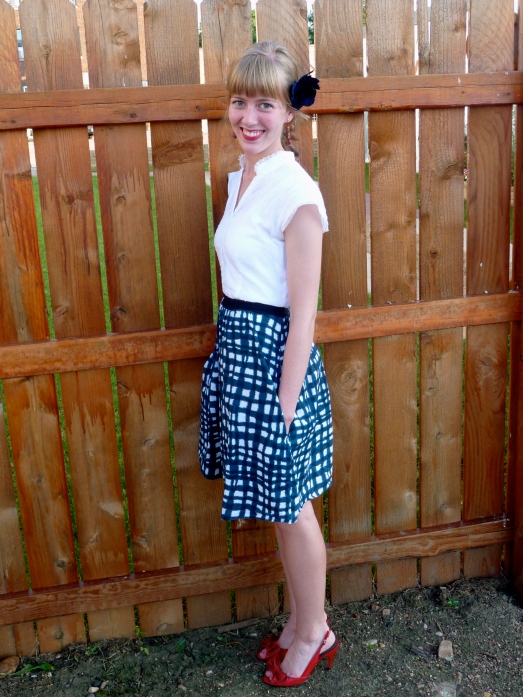
Trim off any dangling threads and marvel at your beautiful handiwork.  Doesn’t it feel good?  Now, put it on and wear it somewhere fancy.  Or not fancy.  Just be sure to wear it.  Otherwise this whole recycling thing was kind of pointless.

Happy 4th of July!

Total money spent:  $0

Total time spent:  2-3 hours