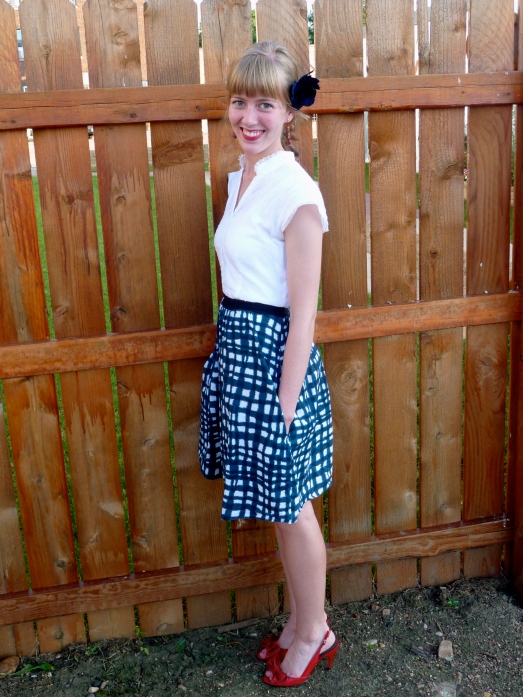
Happy Independence Day a few days late! I whipped up a little something to wear for our nation’s celebration that’s all about using what you already have, and I’d like share it with you. First, let’s take a moment to recognize that, although I’m thankful to my mother for teaching me how to sew, I am no sewing expert. It’s possible likely that the way I made this dress wasn’t the best way, but it worked for me. And just in case any readers out there are similarly unprofessionally trained seamstresses (that’s a mouthful), I’ll share the steps to making what I think turned into a very cute, recycled dress. Judge for yourself:
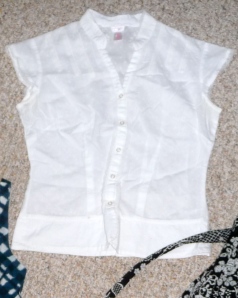
Just the day before, it looked like this:
 And this (ignore the black, flowery fabric on the right – my plans for the dress changed slightly after I snapped these pics):
I cleaned out my closet a few days ago and decided to toss/donate these items. Moving into a new apartment with a rather small closet – and being forced to share said closet with the man you affectionately call your husband – will lead you to do such a thing. And, in this case, it’s not so bad. Now I have a new dress that I love instead of a dress that’s too big and a shirt I never wear. I encourage you to go forth and discover gems like these hiding within your own wardrobe. Then prepare to turn ugly/ill-fitting/not-quite-right into “where did you get that?” … “oh this? I made it.”
The first step was to cut away the pieces I didn’t need: the top part of the dress (since it would essentially become a skirt) and the bottom part of the shirt. For the dress, I simply cut straight along the seam that was already present; where it was sewn onto the top portion of the dress. This left me with a nice straight edge to what would be the bottom of my new dress. As for the shirt, I put it on (along with a bra that I would realistically wear with it – this is important: if you won’t wear it with a sports bra, don’t try to fit it with one!) and pinned the sides where I wanted the waist to be. I like the natural-waisted look on me, but I think this would look great as an empire waist dress, too, if that’s what you prefer. After pinning the sides, I measured the distance from the hem to my pins. Then I measured all the way around the shirt (at about 6 evenly spaced places), marked that distance with a pencil, and cut a straight line between each pencil mark.
 It wasn’t perfect, but it was close enough that no one would notice, anyway. So, I now had the two pieces of my dress, but I needed something stretchy in the middle to make the waist. I would have used a nice, wide piece of black elastic, but I didn’t have any, and I didn’t particularly want to go out and buy it. I dug around in my sewing basket, as well as in the box of clothes I was going to donate, and I came up with a pair of black tights that had a pretty significant run in one leg. The other leg, however, was perfect for making the waist of my new dress. Note: I should advise any potential followers that the material used to make tights is not especially user-friendly. It took to sewing well but tended to gather and roll at the edges. Although it’s not obvious on the finished project, if you are a perfectionist, less cheap than me, or simply don’t have any old tights laying around, hop over to a sewing store and buy yourself a piece of elastic. It will do the same job and save you a step or two.
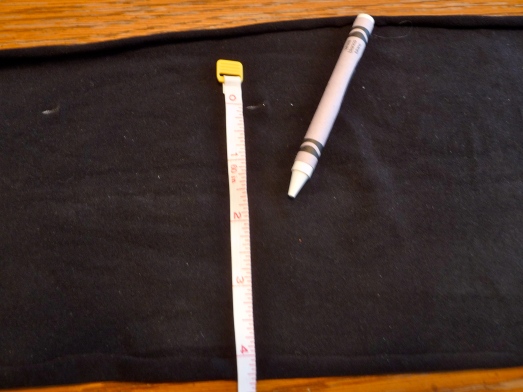
I cut open the leg of the tights and cut a piece to the length I needed (so the waist would be snug but not tight). After deciding on the width I wanted, I doubled that (so I could have a double thickness of the tights material), and added about 1 inch for a seam allowance. Then it was the same process I used for cutting off the bottom of the shirt, except that I marked the measurements with a white crayon this time.
When I had obtained the right length and width of elastic tights, I folded the material – hotdog style, if you will – and sewed the short ends together to make a circle the size of my waist.
Then it was basting time. If you’re not familiar with the verb “to baste” and you desire to sew beautiful, flowing skirts and dresses, you’ll want to learn this stitch. Although I can’t show you how to do this on your particular sewing machine, I’m sure you can figure it out with the help of your machine’s user’s guide. Trust me. I figured it out on a machine that’s conceivably twice my age with the help of a manual that at some point had been soaked in oil and subsequently has semi-transparent pages. You can figure it out.
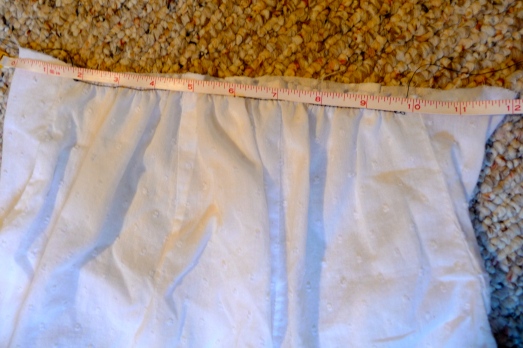
Basically, basting is sewing with a really long stitch that you can later remove or, in this case, pull to gather the fabric. Since cutting the bottom part of the blue dress away from its bodice, the skirt had become a giant square. Not very elegant. After figuring out how to change the seam length on my sewing machine, I sewed all the way around the top of the skirt with a basting stitch, stopping just before my beginning and end stitches met (you don’t want them to overlap, because that might lock the “pulling threads” in place). Then I took one of the dangling end threads and gently pulled on it, scrunching the fabric together as I went. It should look something like this:
 I used my trusty tape measure to adjust the gathered fabric to the right size for my waist and then tied a few knots in the threads at either end. I also tried to evenly space all the gathers, so the dress wouldn’t look bulkier in one spot.
The top part of the dress was a little too wide for my waist, too, so I did almost the same thing with that. Instead of basting and gathering all the way around, though, I wanted all the gathering (at least on the top portion) to be at the back of the dress, so the front would look smooth and flat. I basted on the back side between the two side seams and gathered it until it was the right width. Note my very precise measuring technique here, as well as the black thread that I used on a white shirt in order to avoid changing the thread in my very strange, very old machine:
 Now I had all the parts of the dress ready to go and the real sewing was about to begin…right after some thorough pinning. I didn’t want to end up with a big fold of extra fabric at the end, so pinning was very important, as much as I prefer to skip it when possible.
First Rule of Pinning: Always check several times to make sure that you are pinning the right sides together (yes, I did mess this up once). Definitely do this before sewing a single stitch, and, if you are less-than-a-fan of pinning, also do this before pinning all the way around. In this case, make sure you’re pinning and sewing the “good sides” facing each other.
 Second Rule of Pinning: Always place pins so that they point toward the machine as you sew. This makes it easier to remove them while sewing, and you won’t have to remove them as early, so your product should benefit. Just make sure to take the pins out before you sew over them or your
 mom will be really mad needle might break.
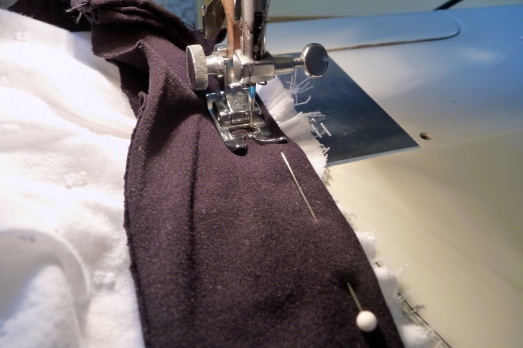 If you’re sewing something that needs to stretch, such as the waist of a skirt or dress (if it doesn’t have a zipper or buttons), you’ll want to use a zig-zag stitch. This helps the elastic or other stretchy material retain its stretchiness without being constrained by a tight, straight stitch.
I sewed the folded edge of the waist material first, because I thought that would make it easier to avoid some of the weird bunching and gathering that the material tended to do. I’m not sure if that’s true, but it’s what I did.
In order to avoid overshadowing a classic novel by the length of this post, I will sum up the rest of the steps, which are pretty simple, if you’ve managed to follow me up to this point.
Zig-zag stitch the elastic to the top of the dress. Overlap your stitching a bit at the end to make it more secure.
Pin the bottom of the dress to the elastic (optional: ignore the Rules of Pinning and repeat this step later with much frustration). Also, if your skirt/dress bottom has side seams or pockets, be sure to line them up with the side seams on your top. It’ll look nicer that way.
Zig-zag stitch the skirt to the elastic. Diddo the overlapping thing.
Trim off any dangling threads and marvel at your beautiful handiwork. Doesn’t it feel good? Now, put it on and wear it somewhere fancy. Or not fancy. Just be sure to wear it. Otherwise this whole recycling thing was kind of pointless.
Total money spent: $0
Total time spent: 2-3 hours


Lovely Suz. I look forward to reading your blog and following along when possible.
Thanks, Ash! I’m happy to have you!
I like it! This is by far the most subdued and chic take on your flag’s celebration via clothing I have seen online.
(Not being from the US, I was starting to overdose on the US blogosphere’s tricolored madness.)
This Frankendress is just too cute! (and so are the shoes!!!)
Thank you for the sweet compliment! I’m so glad you like the dress as much as I do. Follow along…I’ll try to keep it chic around here!
Wow. What a stunningly beautiful model!
Pingback: Unsimple Living
Hi, just wanted to say, I enjoyed this blog post. It was helpful.
Keep on posting!